728x90
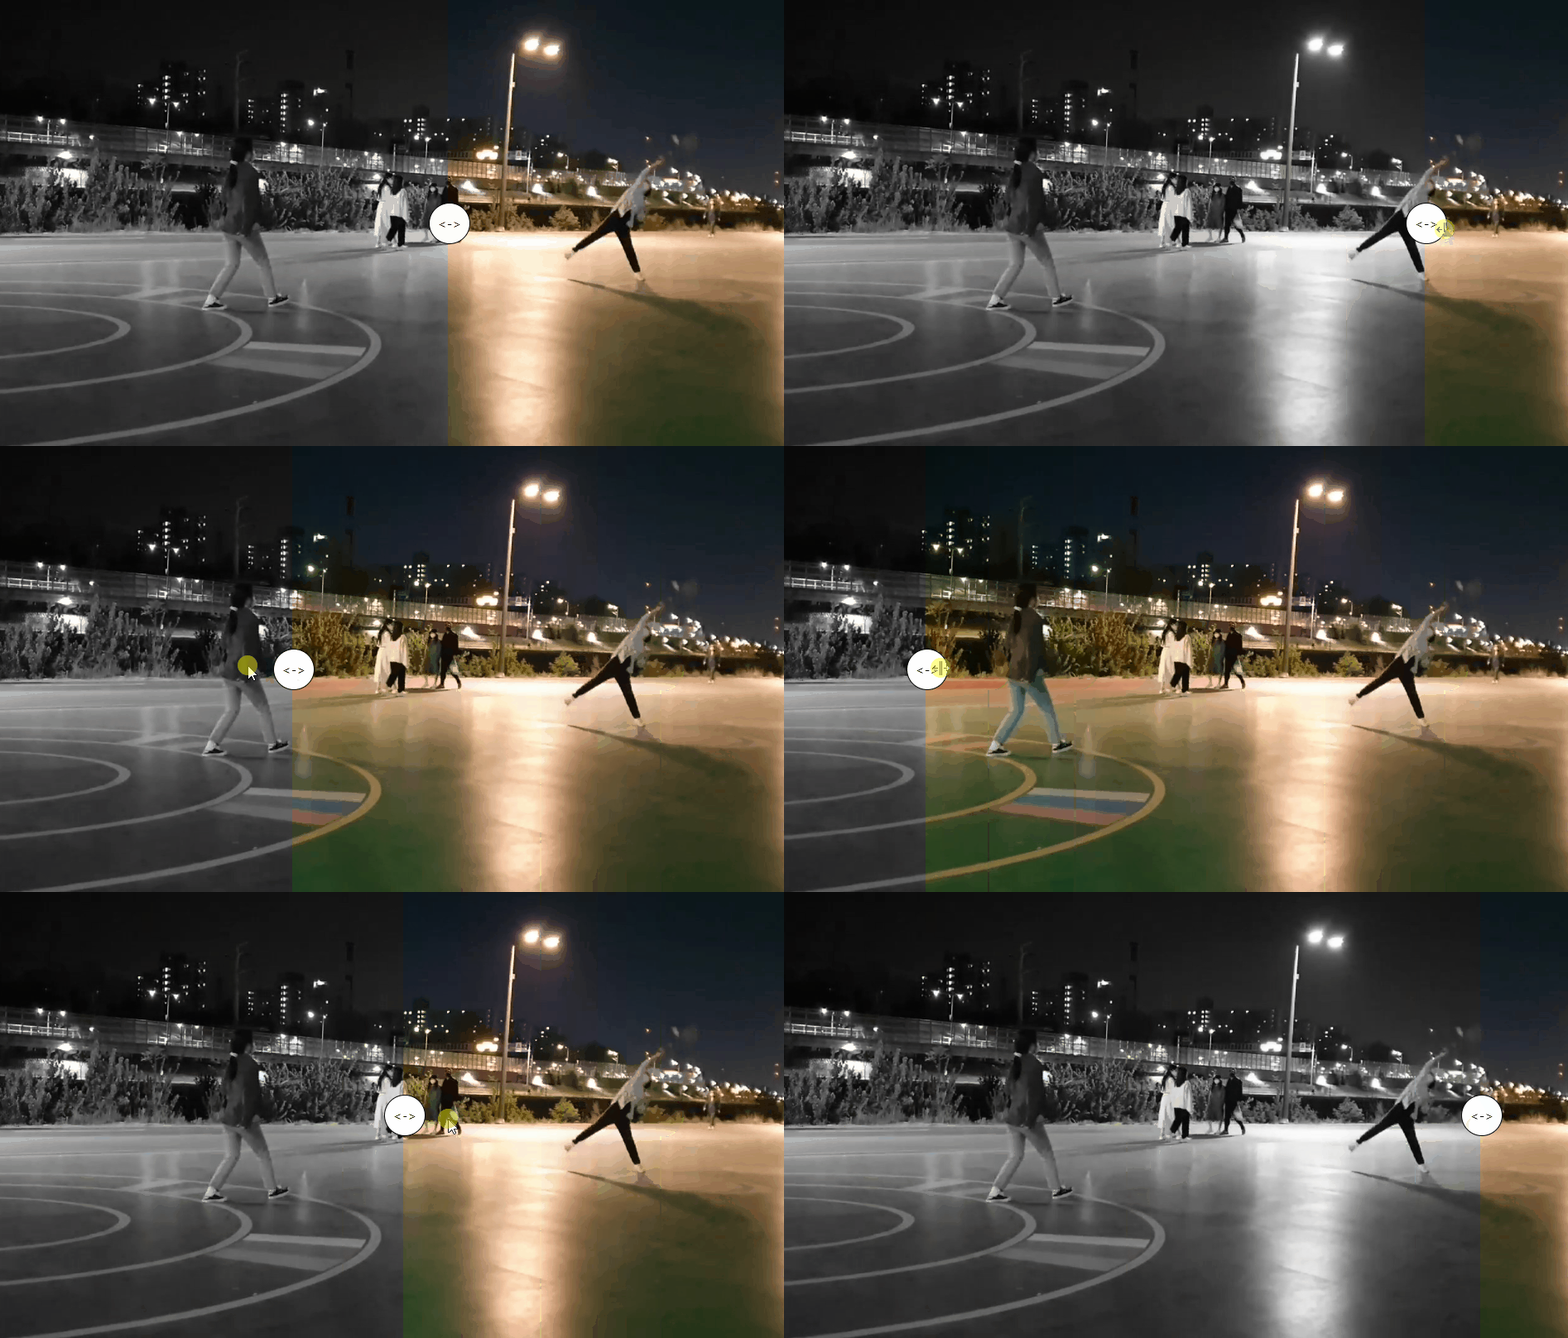
막대를 x축 방향으로 슬라이드를 통해 두개의 이미지를 보여지도록 개발했다.
1. 이미지 2개 겹치기
<div className="crop1"> //이미지 1개
<img
className="img1"
src={WhiteImage}
alt="before"
draggable={false}
/>
</div>
/** 막대
<div
className="line"
ref={ref}
onMouseDown={() => setPressed(true)}
onMouseUp={() => setPressed(false)}
>
<span className="circle">{"<->"}</span>
</div>
**/
<div className="crop2">//이미지 2개
<img className="img2" src={GrayImage} alt="after" draggable={false} />
</div>
styled-components
const Layout = styled.div`
display: flex;
justify-content: center;
width: 100%;
height: 100%;
position: relative;
overflow: hidden;
border: 1px solid ${({ theme }) => theme.gray300};
div[class^="crop"] {
position: absolute;
width: 100%;
height: 100%;
overflow: hidden;
top: 0;
left: 0;
right: 0;
}
img {
overflow: hidden;
width: 100%;
height: 100%;
object-fit: contain;
max-width: initial;
}
`;
2. 막대 x축을 움직이는 로직
<div
className="line"
ref={ref} //막대에 ref 부여
onMouseDown={() => setPressed(true)}
onMouseUp={() => setPressed(false)}
>
<span className="circle">{"<->"}</span>
</div>
///////////
const onMouseMove = useCallback(
(event: any) => {
if (pressed) {
setPosition({
x: position.x + event.movementX, //막대의 위치 position에 저장
});
}
},
[position.x, pressed]
);
//position이 변할때마다 막대 위치 변경 (x축으로 이동하기 때문에 y축은 0px)
useEffect(() => {
if (ref.current) {
ref.current.style.transform = `translate(${position.x}px, 0px)`;
}
}, [position]);
//막대 css
.line {
padding: 2px;
position: absolute;
z-index: 9999;
top: 0;
bottom: 0;
display: flex;
flex-direction: column;
justify-content: center;
align-items: center;
background-color: ${({ theme }) => theme.red100};
.circle {
user-select: none;
cursor: col-resize;
display: flex;
flex-direction: column;
justify-content: center;
align-items: center;
position: absolute;
border-radius: 50%;
width: 50px;
height: 50px;
justify-content: center;
border: 1px solid ${({ theme }) => theme.red200};
background-color: white;
}
cursor: pointer;
}
3. 막대 기준으로 흑/백 이미지 보여주기
막대 전 후로 보여지기 위해 나는 css의 clip 속성을 사용했다.
(clip이란 특정 부분만 보이도록 하는 속성이다 이미지 자르기와 비슷하다.)
아까 우린 막대에게 ref를 부여해주고, 이미지를 가지고있는 부모 div에게도 ref로 dom에 접근할 수 있게 했다.
그러므로 막대의 position이 변경할 때마다 layer의 width, height 정보, 자르는 이미지의 크기 정보를 가지고 있을 것이다.
useEffect(() => {
if (ref.current) {
ref.current.style.transform = `translate(${position.x}px, 0px)`;
}
//추가
handleResize();
}, [position]);
const handleResize = () => {
const layerW = LayerRef.current?.getBoundingClientRect();//부모 div의 정보
const barRef = ref.current?.getBoundingClientRect(); // 막대의 정보
if (layerW && barRef) {
setLayerInfo({ height: layerW?.height, width: layerW?.width });
setWidth1(Math.abs(layerW?.left - barRef.x));
// layerW.left-barRef.x = 레이어의 left -막대의 x = 막대 왼쪽부분의 크기가 나옴
}
};
이 값을 Layout에 props로 넘겨줘서 styled-components에서 clip을 사용해보겠다.
//막대의 정보와 layer의 정보를 넘겨줌
<Layout
ref={LayerRef}
layerInfo={layerInfo}
width1={width1}
onMouseMove={onMouseMove}
onMouseUp={() => setPressed(false)}
>
//레이어의 정보와 막대의 정보가 있을때 crop div에게 clip을통해 보여질 부분을 설정하겠다.
${({ layerInfo, width1 }) =>
layerInfo &&
width1 &&
css`
//rect( <top>, <right>, <bottom>, <left> )
.crop1 { //왼쪽부분의 이미지
clip: rect(
0,
${layerInfo?.width}px,
${layerInfo?.height}px,
${width1}px
);
}
.crop2 { //오른쪽 부분의 이미지
clip: rect(0, ${width1}px, ${layerInfo.height}px, 0);
}
`}
이때 레이어의 정보를 나눠주는 이유가 뭐냐면, 화면의 크기가 변경됨에 따라 함께 clip 크기가 조정되기 위해 넘겨줬다.
화면 크기를 넘기는 정보는
useEffect(() => {
window.addEventListener("resize", handleResize);
return () => {
window.removeEventListener("resize", handleResize);
};
});
useEffect가 윈도우가 리사이징될때마다 감지하여, 위에 언급되었던 함수를 실행해주어 layer의 정보를 지정하게 해준다.
전체 코드
import React, { useCallback, useEffect, useRef, useState } from "react";
import styled, { css } from "styled-components";
import GrayImage from "../../img/gray.png";
import WhiteImage from "../../img/white.png";
type LayoutProps = {
width1?: number,
width2?: number,
layerInfo?: { height: number, width: number },
};
const Main = () => {
const ref = useRef(null);
const LayerRef = useRef(null);
const [pressed, setPressed] = useState(false);
const [position, setPosition] = useState({ x: 0 });
// const width1 = useRef<number>(750);
// const width2 = useRef<number>(750);
const [width1, setWidth1] = useState(0);
const [width2, setWidth2] = useState(0);
const [layerInfo, setLayerInfo] = useState({ height: 0, width: 0 });
const onMouseMove = useCallback(
(event: any) => {
if (pressed) {
setPosition({
x: position.x + event.movementX,
});
}
},
[position.x, pressed]
);
useEffect(() => {
if (ref.current) {
ref.current.style.transform = `translate(${position.x}px, 0px)`;
}
handleResize();
}, [position]);
const handleResize = () => {
const layerW = LayerRef.current?.getBoundingClientRect();
const barRef = ref.current?.getBoundingClientRect();
if (layerW && barRef) {
setLayerInfo({ height: layerW?.height, width: layerW?.width });
setWidth1(Math.abs(layerW?.left - barRef.x));
}
};
useEffect(() => {
window.addEventListener("resize", handleResize);
return () => {
window.removeEventListener("resize", handleResize);
};
});
return (
<>
<Layout
ref={LayerRef}
layerInfo={layerInfo}
width1={width1}
onMouseMove={onMouseMove}
onMouseUp={() => setPressed(false)}
>
<div className="crop1">
<img
className="img1"
src={WhiteImage}
alt="before"
draggable={false}
/>
</div>
<div
className="line"
ref={ref}
onMouseDown={() => setPressed(true)}
onMouseUp={() => setPressed(false)}
>
<span className="circle">{"<->"}</span>
</div>
<div className="crop2">
<img className="img2" src={GrayImage} alt="after" draggable={false} />
</div>
</Layout>
</>
);
};
const Layout = styled.div`
display: flex;
justify-content: center;
width: 100%;
height: 100%;
position: relative;
overflow: hidden;
border: 1px solid ${({ theme }) => theme.gray300};
.line {
padding: 2px;
position: absolute;
z-index: 9999;
top: 0;
bottom: 0;
display: flex;
flex-direction: column;
justify-content: center;
align-items: center;
background-color: ${({ theme }) => theme.red100};
.circle {
user-select: none;
cursor: col-resize;
display: flex;
flex-direction: column;
justify-content: center;
align-items: center;
position: absolute;
border-radius: 50%;
width: 50px;
height: 50px;
justify-content: center;
border: 1px solid ${({ theme }) => theme.red200};
background-color: white;
}
cursor: pointer;
}
div[class^="crop"] {
position: absolute;
width: 100%;
height: 100%;
overflow: hidden;
top: 0;
left: 0;
right: 0;
}
${({ layerInfo, width1 }) =>
layerInfo &&
width1 &&
css`
.crop1 {
clip: rect(
0,
${layerInfo?.width}px,
${layerInfo?.height}px,
${width1}px
);
}
.crop2 {
clip: rect(0, ${width1}px, ${layerInfo.height}px, 0);
}
`}
img {
overflow: hidden;
width: 100%;
height: 100%;
object-fit: contain;
max-width: initial;
}
`;
export default React.memo(Main);
728x90
반응형
'REACT' 카테고리의 다른 글
[React.js/TypeScript] Intersection Observer 구현해보기 (0) | 2022.09.20 |
---|---|
[React.js] Props로 text를 넘길때 \n 안먹는 이슈 (0) | 2022.08.04 |
lodash의 throttle과 debounce (0) | 2022.04.08 |
google-maps-react [리액트 구글 맵 기본 장소 마커 지우기] (0) | 2022.04.08 |
[React.js] html2canvas cors 에러 (0) | 2022.03.24 |